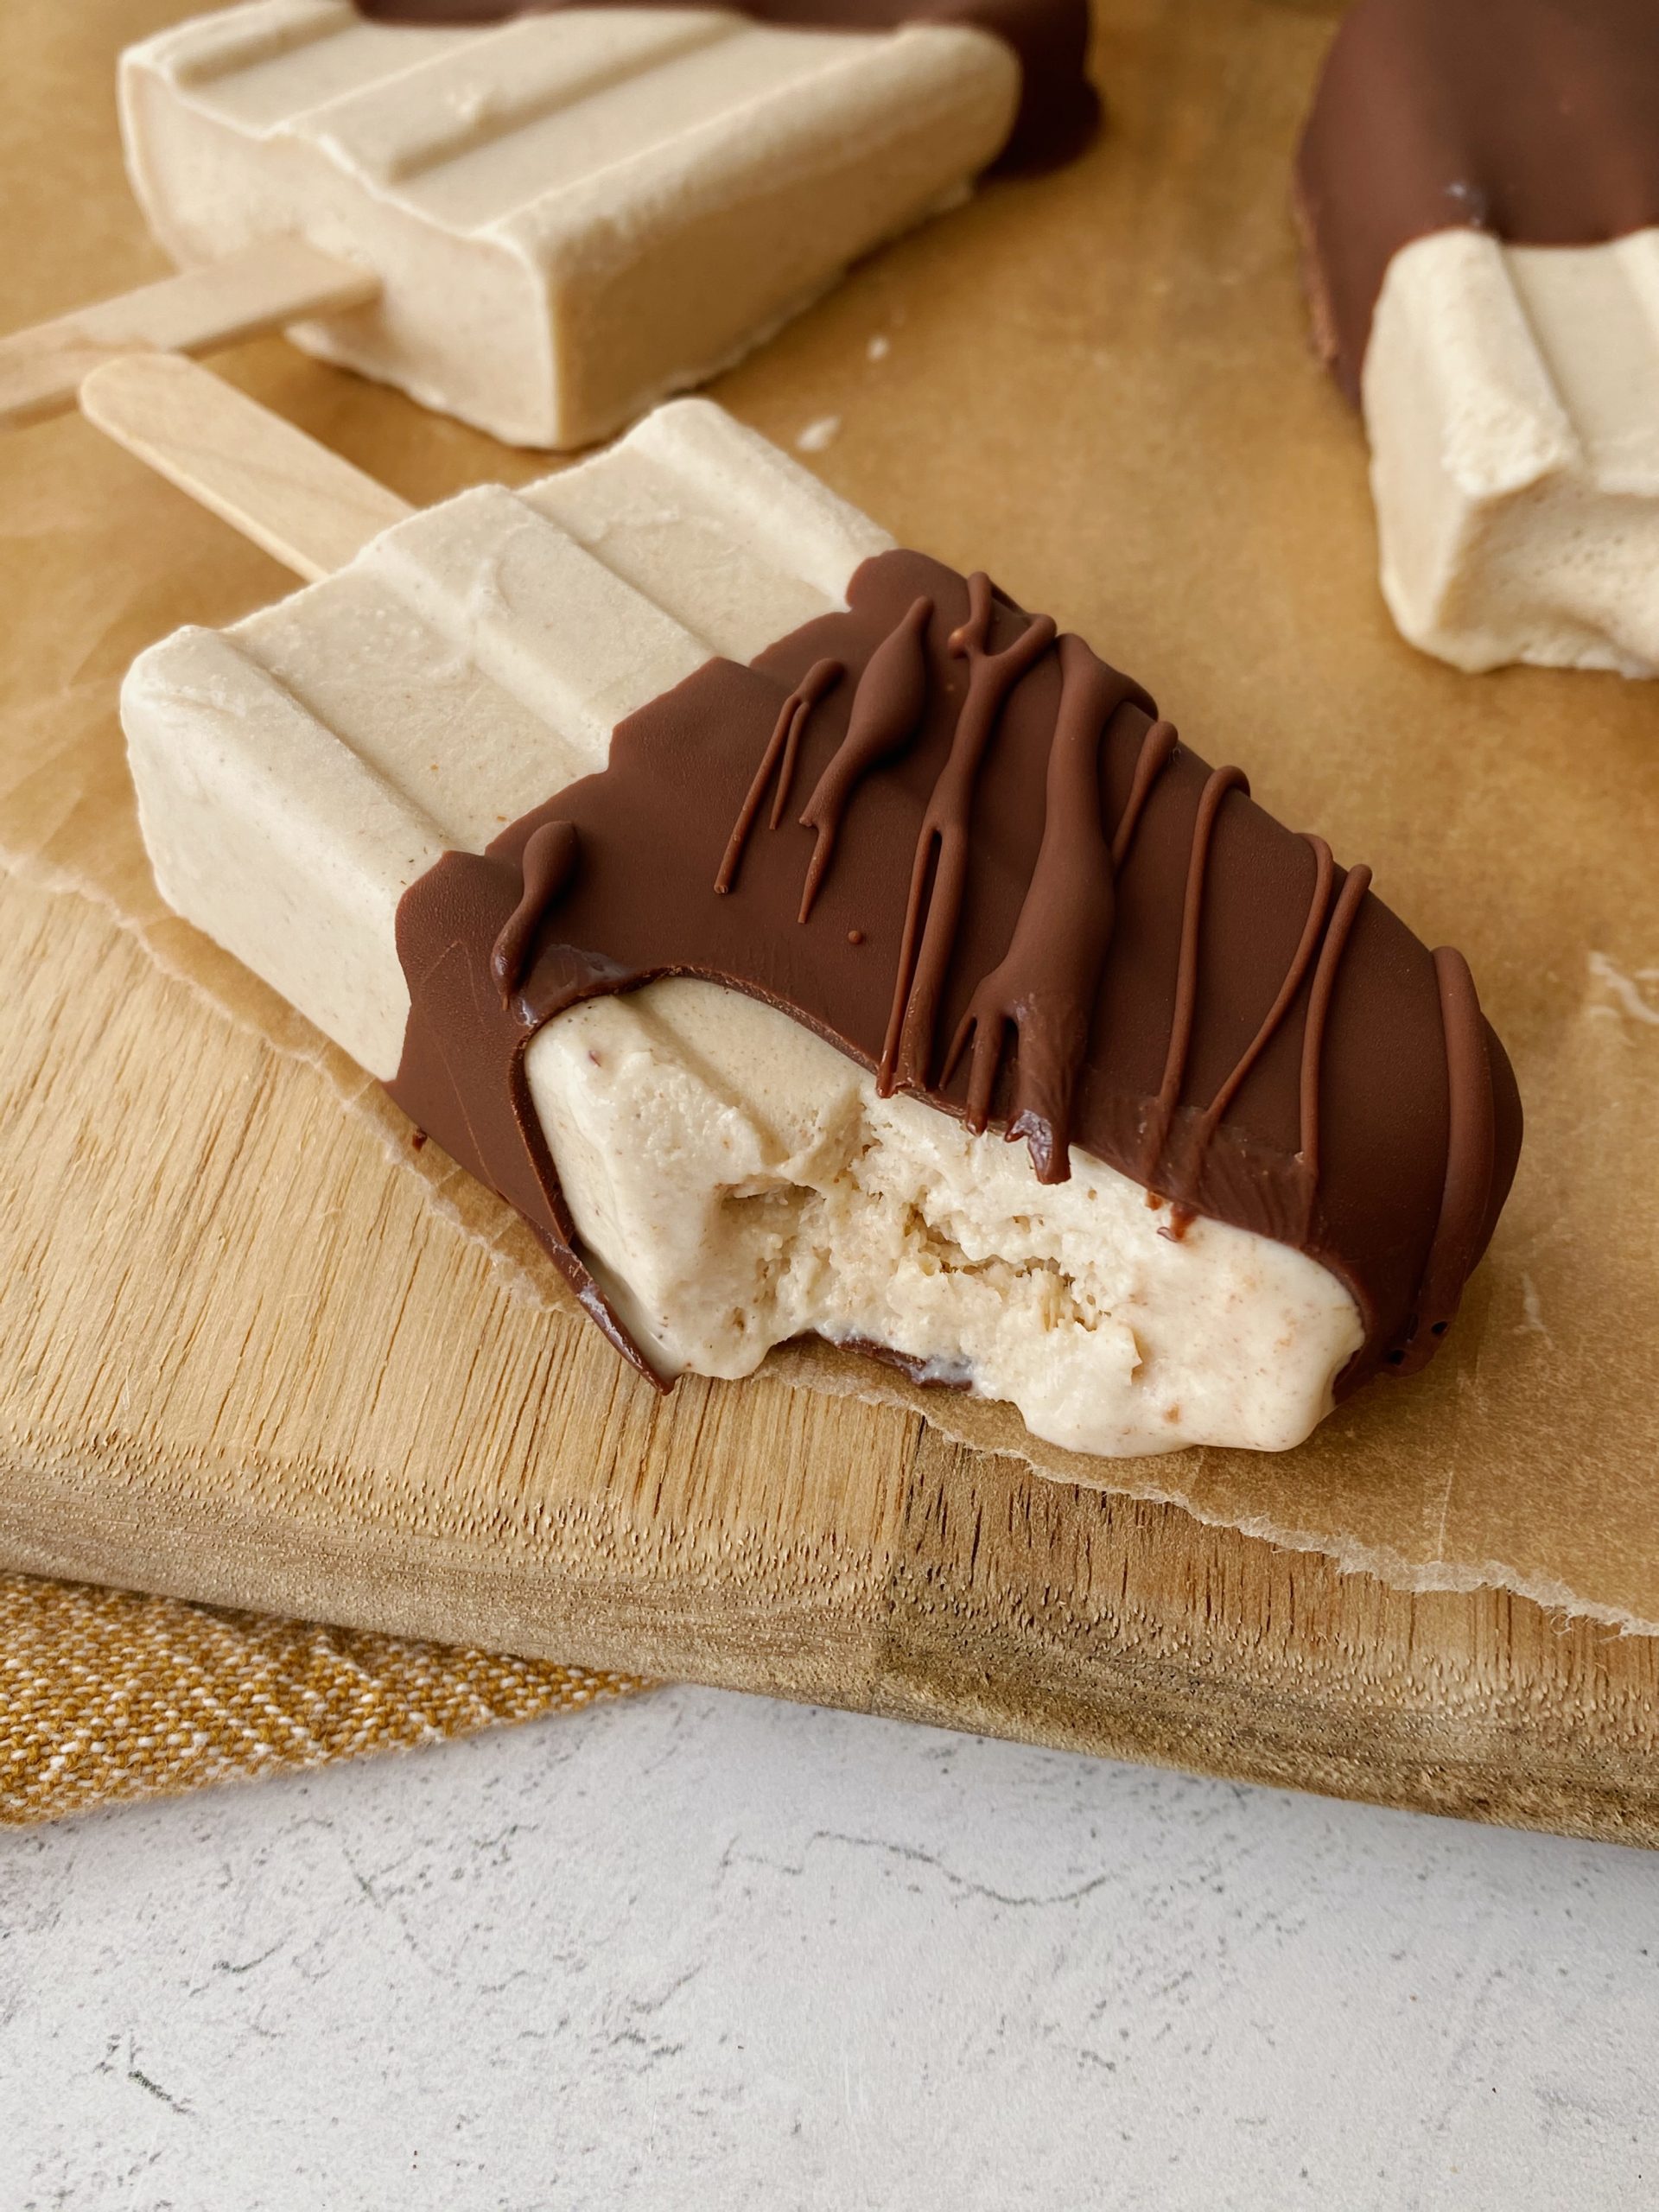
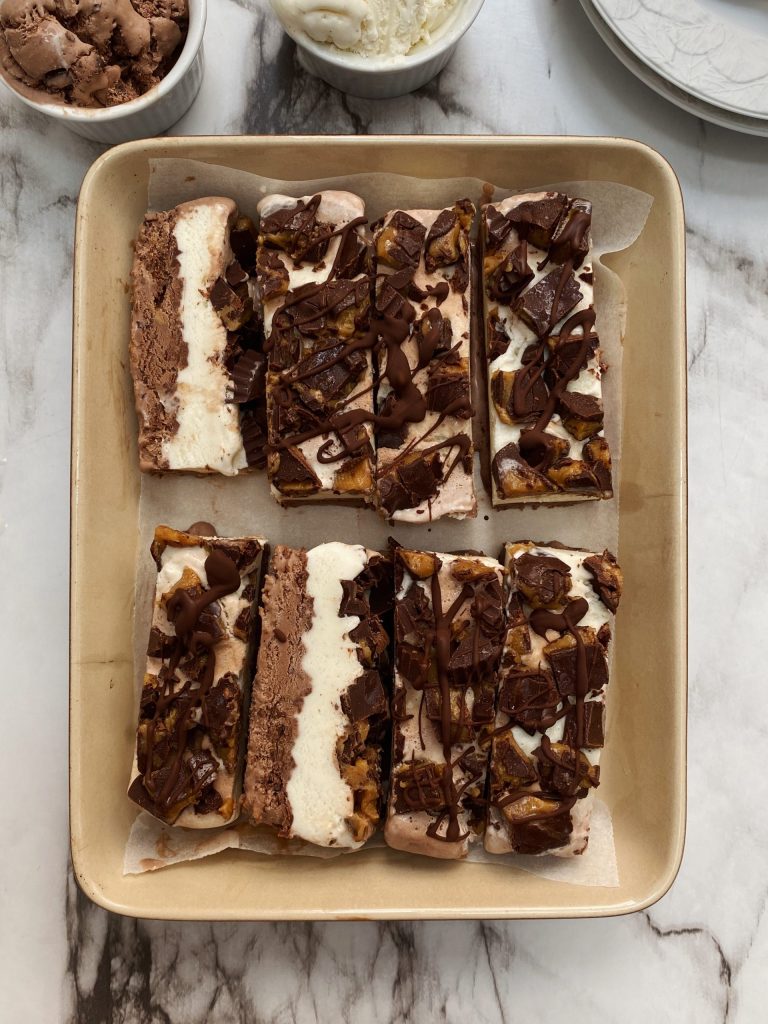
Cool off this summer with these super simple 8 ingredient peanut butter ice cream bars! They’re plant-based, made with whole ingredients, and are so easy to make!

Peanut Butter Ice Cream Bars
Homemade ice cream bars are so fun to make. I purchased an ice cream mold a few years ago, and have been using it every summer since!
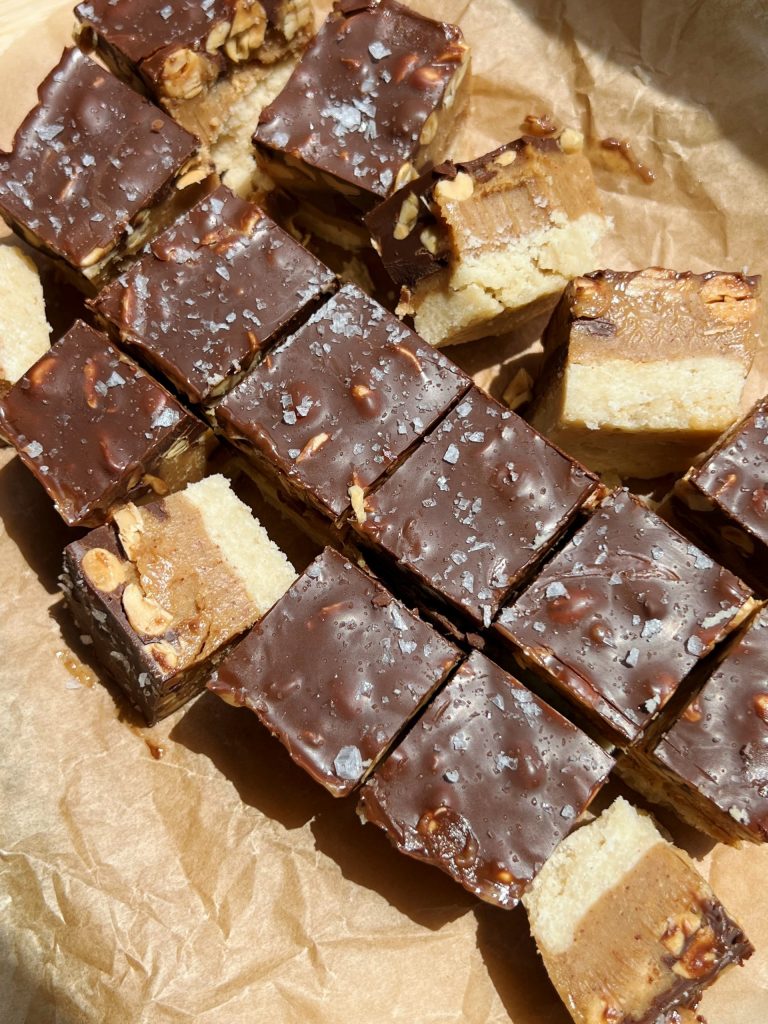
These peanut butter ice cream bars are made with 8 simple ingredients, and pack in that delicious peanut butter chocolate flavor combo. They’re coated in a simple chocolate shell made from vegan chocolate chips and coconut oil, and are such a delicious treat after a long day.
Who doesn’t love a good ice cream bar in the summer? While I definitely enjoy my fair share of store-bought ice cream, there’s something about homemade treats that just makes things that much better.
Plus, when they’re made with whole ingredients that you likely have in your pantry, you can’t go wrong!

How to make vegan ice cream bars
This recipe comes together so quickly. The hardest part is letting them freeze! To make these vegan ice cream bars, here’s what you’ll need:
Ingredients:
- full-fat coconut milk- do not substitute lite coconut milk in this recipe! It will not yield the same results.
- raw cashews-
- natural peanut butter- I always opt for a peanut butter that’s made with roasted peanuts and unsweetened
- pure maple syrup- you can substitute agave in this recipe, or honey if you’re not vegan!
- cinnamon
- salt
- vegan chocolate chips- I like to choose a chocolate thats around 60% cocoa
- coconut oil- the coconut oil helps melt the chocolate chips more smoothly, making the bars easier to coat
Equipment needed:
- high-speed blender- a high speed blender is key to making the ice cream texture smooth and creamy
- ice cream mold- this is the one I use! to easily remove the bars from the mold, I let them run under hot water for 30-40 seconds before removing them

The ice cream ingredients get blended together until smooth, then poured into your ice cream molds. Once the bars are frozen, run the molds under warm water for 1 minute to help them release more easily.
Coat each bar in the melted dark chocolate, then layer them onto a parchment lined tray. Place them back into the freezer for another 10-15 minutes to harden, and enjoy the most delicious homemade treat!

Other recipes to help you cool off this summer:
Dark Chocolate Cherry Smoothie
Arugula Beet Salad
Tahini Coffee Smoothie
Vegan Peanut Butter Ice Cream Bars
Ingredients
- 1 can full-fat coconut milk
- 1/2 cup raw cashews, soaked in hot water for 30 minutes
- 1/3 cup pure maple syrup
- 1/4 cup natural peanut butter
- 1/4 tsp cinnamon
- 1/4 tsp salt
Chocolate Coating
- 3/4 cup vegan chocolate chips
- 1 1/2 tbsp coconut oil
Directions
- Add in all of your ice cream ingredients into a blender. Blend on high for about 3- 4 minutes until smooth.
- Divide among 10 ice cream molds. Cover your ice cream mold with the lid, and place wooden popsicle sticks 3/4 of the way into each mold.
- Freeze for at least 4 hours or overnight.
- Melt the chocolate chips with the coconut oil in 30 second increments in the microwave until smooth, for about 2 minutes total
- Once your bars are frozen, pour the chocolate into a deep mug, and dip each bar 3/4 of the way into the chocolate. Layer them on a parchment lined tray or cutting board and place them back into the freezer for 10-15 minutes to harden. Optional: Top them with crushed peanuts after coating them in chocolate
- To store, layer them in a freezer-safe container with parchment between each layer, or individually wrap each bar with a small piece of parchment and place into a large ziplock bag.


Ratings and Reviews
write a review