Chewy, no-bake peanut butter granola bars are the best breakfast or snack bars to make this week! Filled with whole grains and delicious peanut butter chocolate flavor, and made with the simplest ingredients.

Homemade Granola Bars
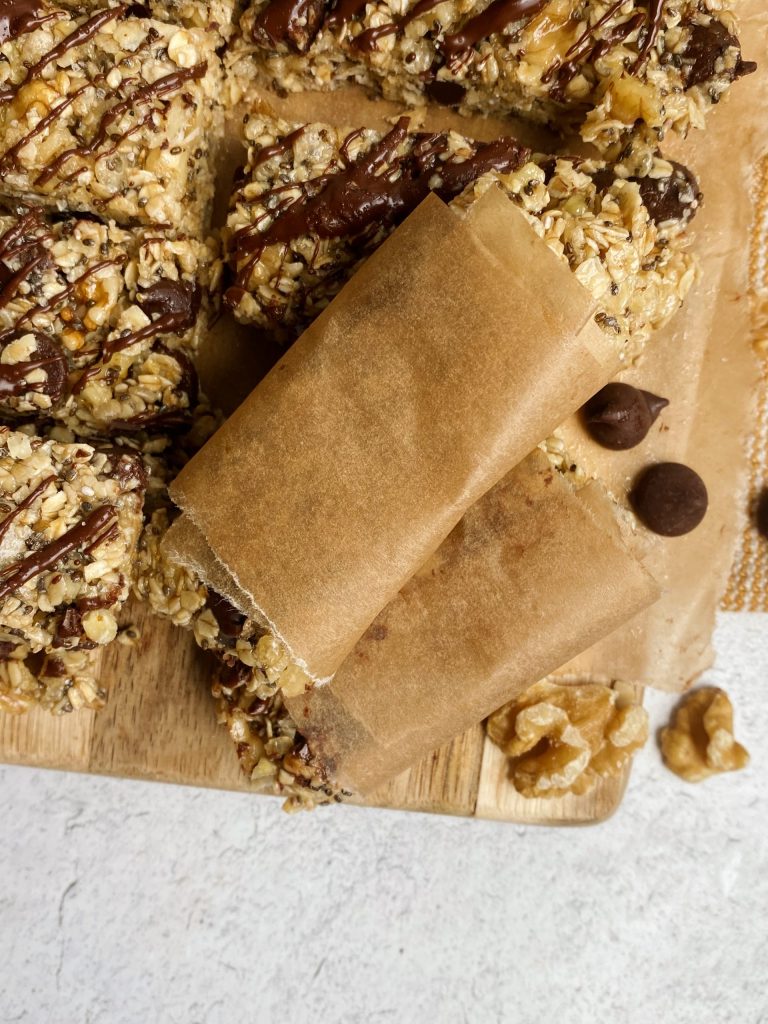
These no-bake granola bars are such a convenient snack or breakfast to have on hand. They get that perfect chewiness from the oats, with a little added crunch from the rice cereal. Plus, the peanut butter chocolate flavor combo just can’t be beat!
These bars are plant-based and gluten-free, and have been the perfect pre-workout snack these last few days.
I love to sprinkle a little sea salt over the top for that ultimate sweet & salty flavor.

How to make homemade granola bars
Chocolate chip peanut butter granola bars come together so easily with just a handful of ingredients. Here’s what you’ll need:
Rolled Oats- oats are a rich source of fiber, protein and iron. They’re loaded with important vitamins and minerals, like phosphorous, magnesium, zinc and folate
Crispy rice cereal- the cereal adds the perfect texture to these bars with a delicious added crunch.
Creamy peanut butter- I always opt for one with no added sugar, and made with roasted peanuts!
Chia Seeds- the chia seeds provide omega-3 fats, and help bind these bars together
Pure Maple Syrup
Coconut Oil- refined coconut oil is my go-to for baking. It has almost no smell or taste, compared to virgin coconut oil which has a rich coconut flavor. Either one would work well, but your bars may taste more like coconut if you use a virgin oil
Sea Salt
Dark Chocolate Chips– I love to opt for 70% cocoa content when choosing chocolate chips or chunks!

Mix the dry ingredients together in a bowl, then whisk the wet ingredients over the stove for a few minutes to thicken up.
Once the peanut butter, maple syrup and coconut oil are thickened, pour the wet mixture into the dry ingredients and press it into a baking dish.
The toughest part is waiting for these bars to cool, but they’re 100% worth it- trust me 🙂

These bars are seriously so easy to make, and really taste store-bought. They’ll stay fresh in the fridge for up to 3 weeks in an airtight container, or can be frozen for 3 months.

No-bake chocolate chip peanut butter granola bars are a nutrient dense snack to have on hand. They’re dairy-free and gluten-free friendly, and made with only the best ingredients!
More oatmeal bar recipes you may like:
Strawberry Chia Granola Bars
Cinnabun Oatmeal Bars
No-bake Dark Chocolate & Walnut Granola Bars
Chocolate Chunk Banana Oatmeal Bars

Chocolate Chip Peanut Butter Granola Bars
Ingredients
- 2 cups quick-cooking oats
- 1 cup crispy rice cereal
- 1/2 cup pure maple syrup
- 1/4 cup chia seeds
- 1/3 cup creamy peanut butter, unsweetened
- 3 tbsp coconut oil
- 1 tsp vanilla extract
- 1/4 tsp salt
- 1/2 cup mini chocolate chips, dark or semi-sweet
Directions
- In a small sauce pan, combine the peanut butter, maple syrup, and coconut oil over medium heat. Whisk together until thick and creamy, for about 2-3 minutes.
- Turn the fire off and whisk in the vanilla extract.
- Let the mixture cool while you combine the dry ingredients.
- In a large bowl, combine the oats, cereal, chia seeds, salt, and 1/4 cup of the chocolate chips.
- Pour the wet ingredients into the dry bowl, and toss together until evenly incorporated.
- Line a medium sized baking dish, about 10″ by 7″, with parchment paper. Flatten the mixture into the pan and even out the top.
- Let the mixture sit for 1 minute or so to cool, then pour the rest of the chocolate chips over the top and flatten them into the bars with the back of a cup or with your hands.
- Refrigerate the bars for at least 2 hours. Once hard, slice into 12 squares, or 16 bars.
- Keep refrigerated in an airtight container for up to 3 weeks!


Easy, on-the-go snacks make up a significant portion of my daily diet, but I always choose safe and nutritious options. I chose granola bars from https://kodiakcakes.com/collections/granola-bars to ensure that even on a hectic day, I can have nutritious meals rather than junk!