
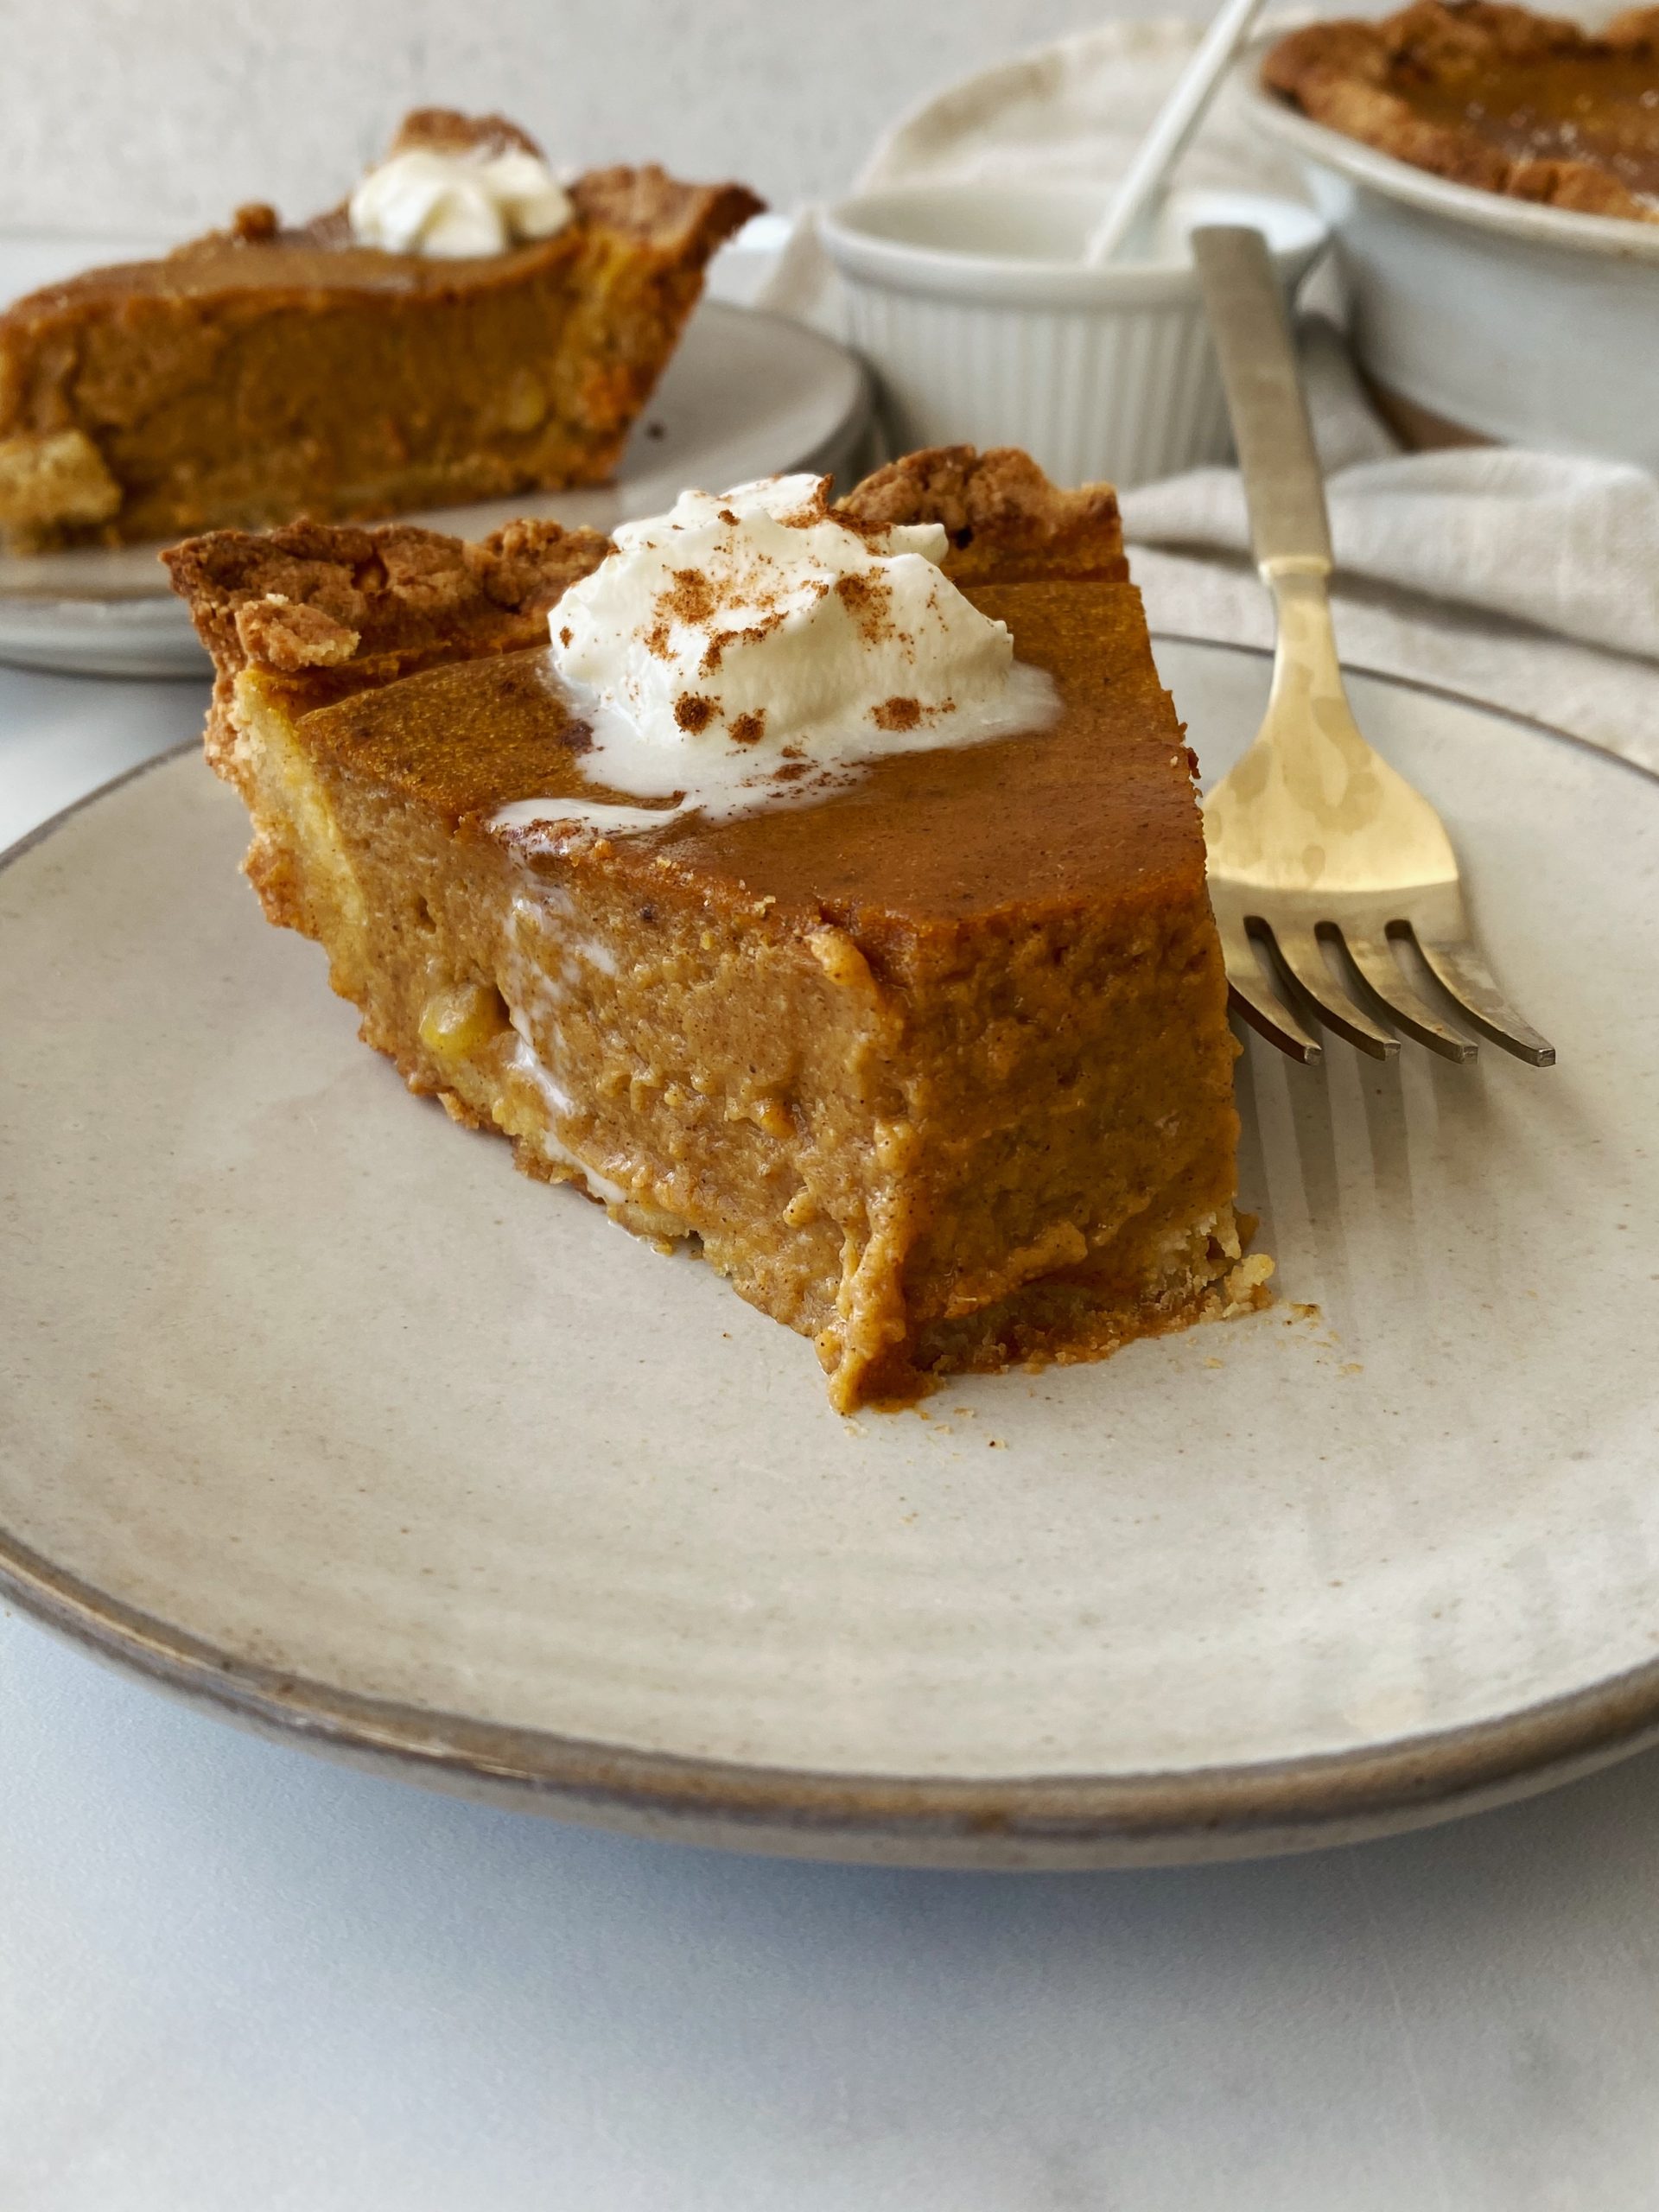
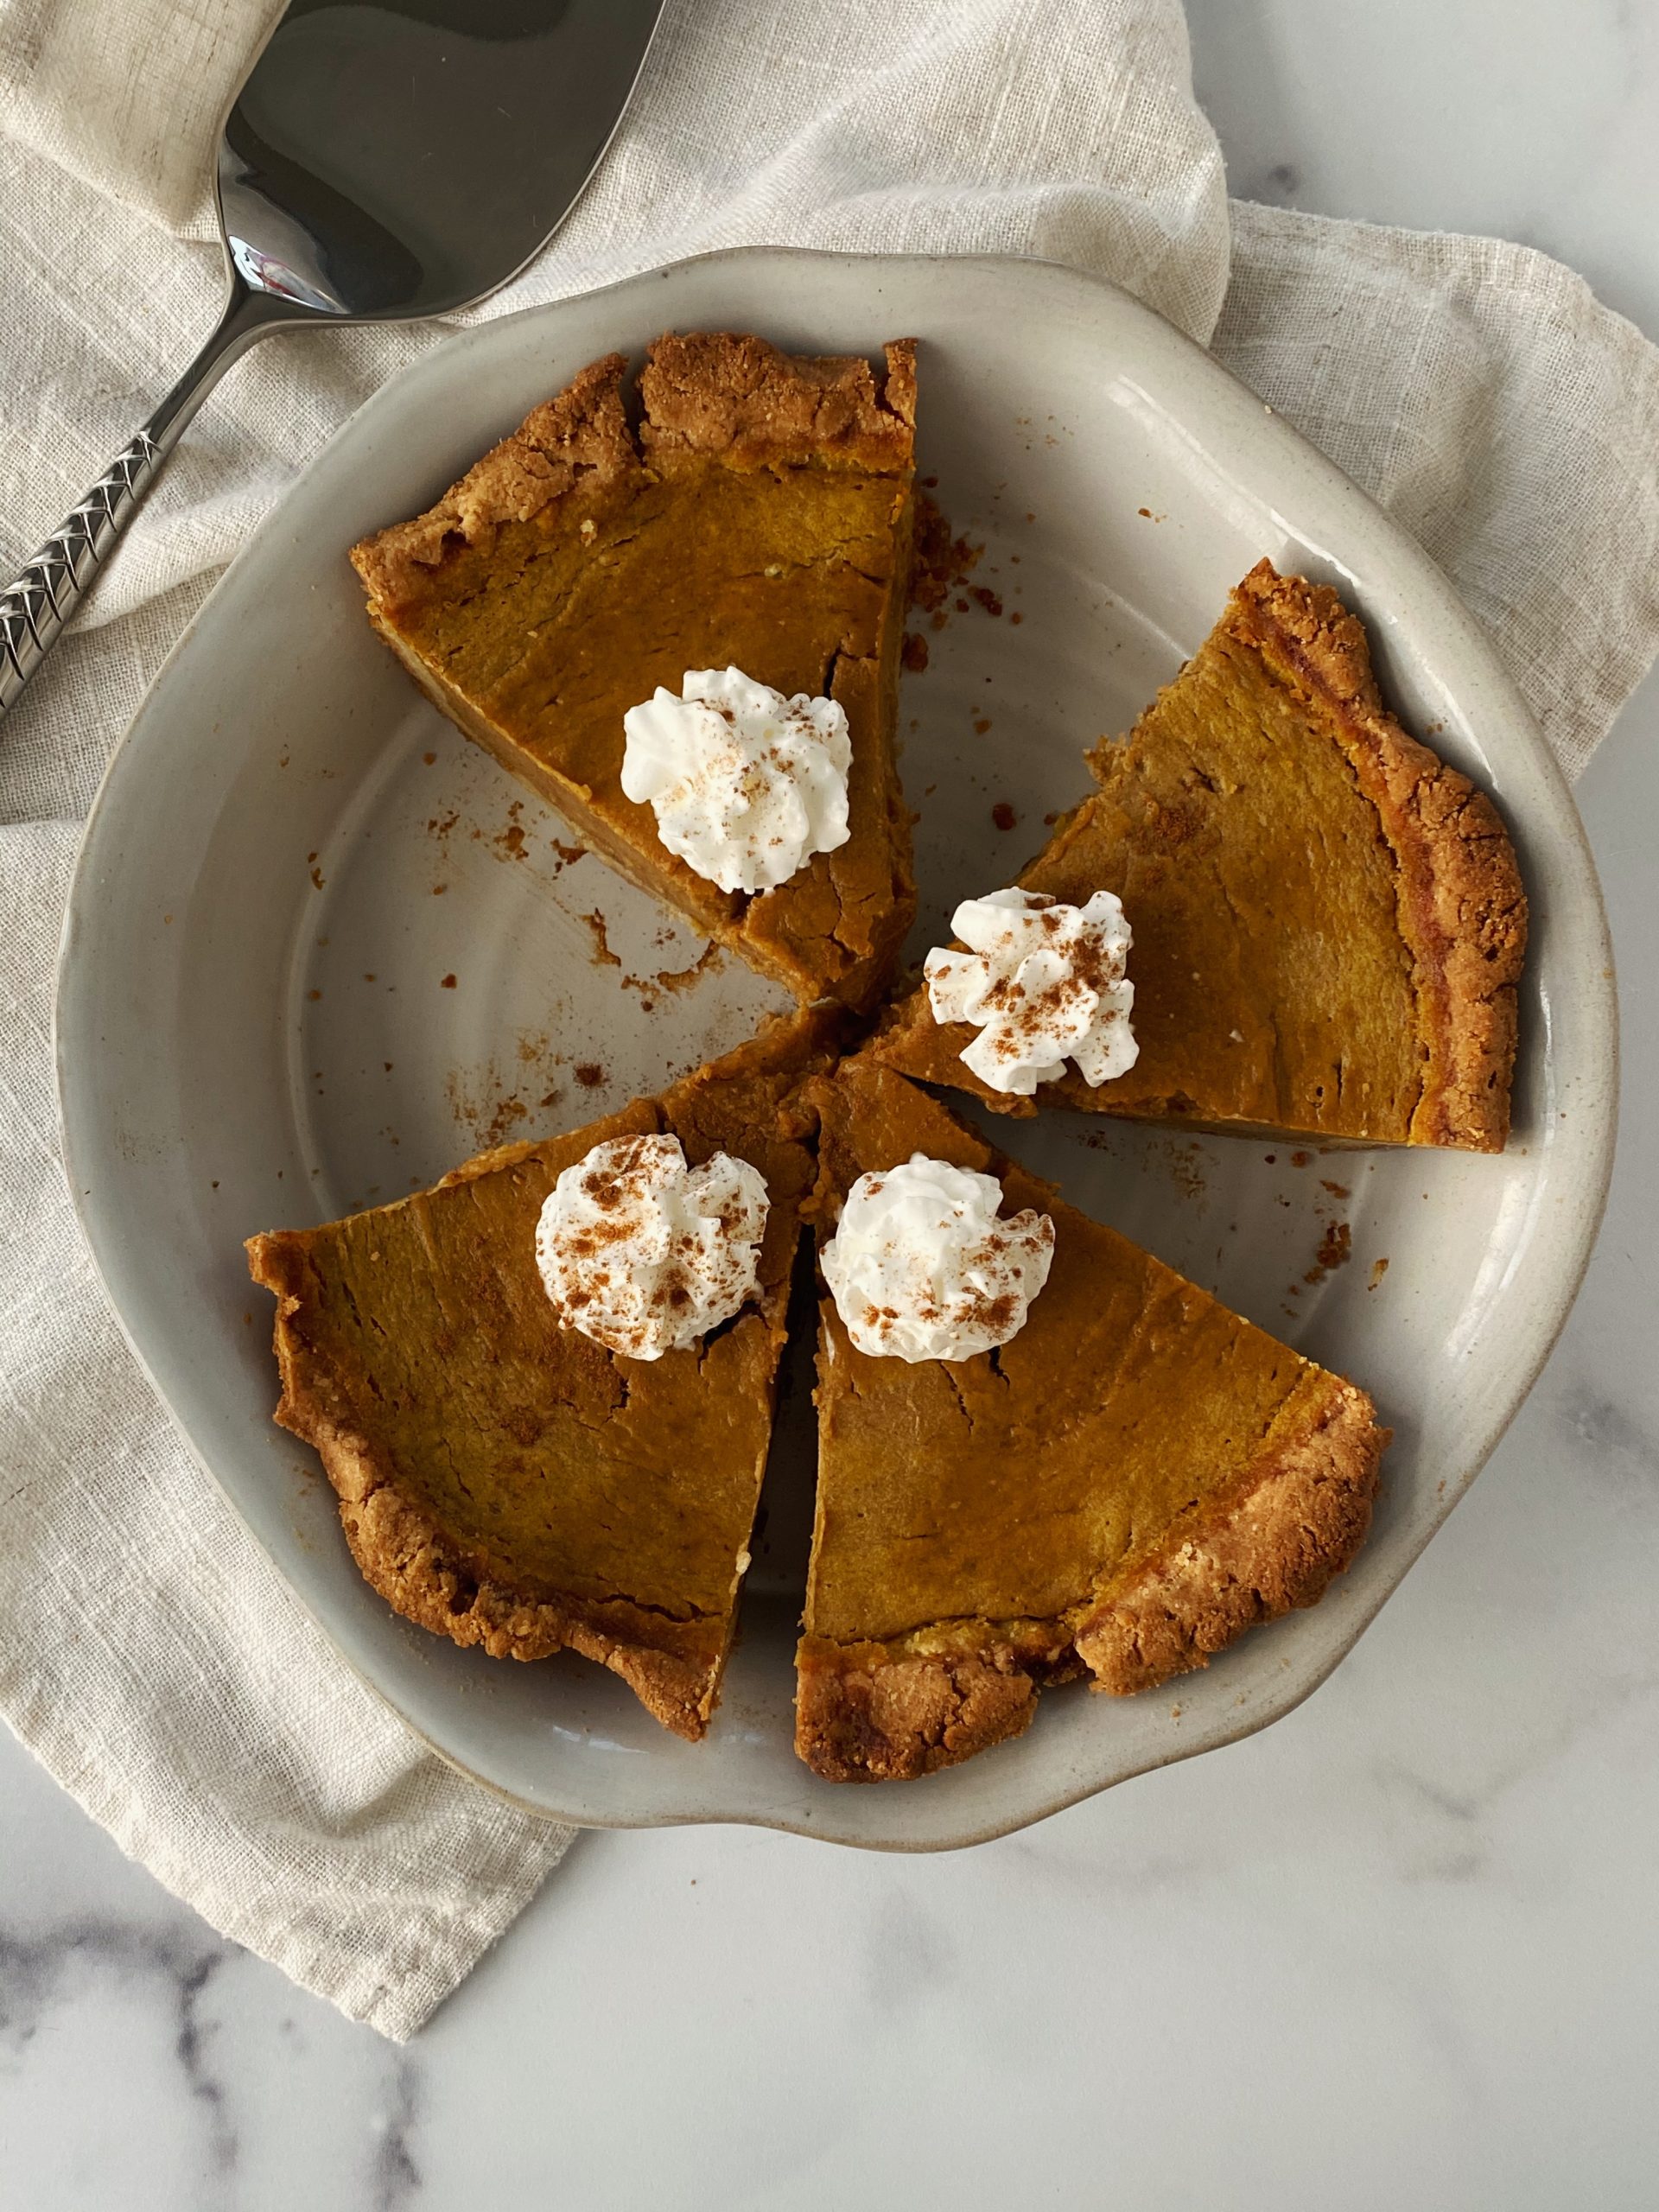
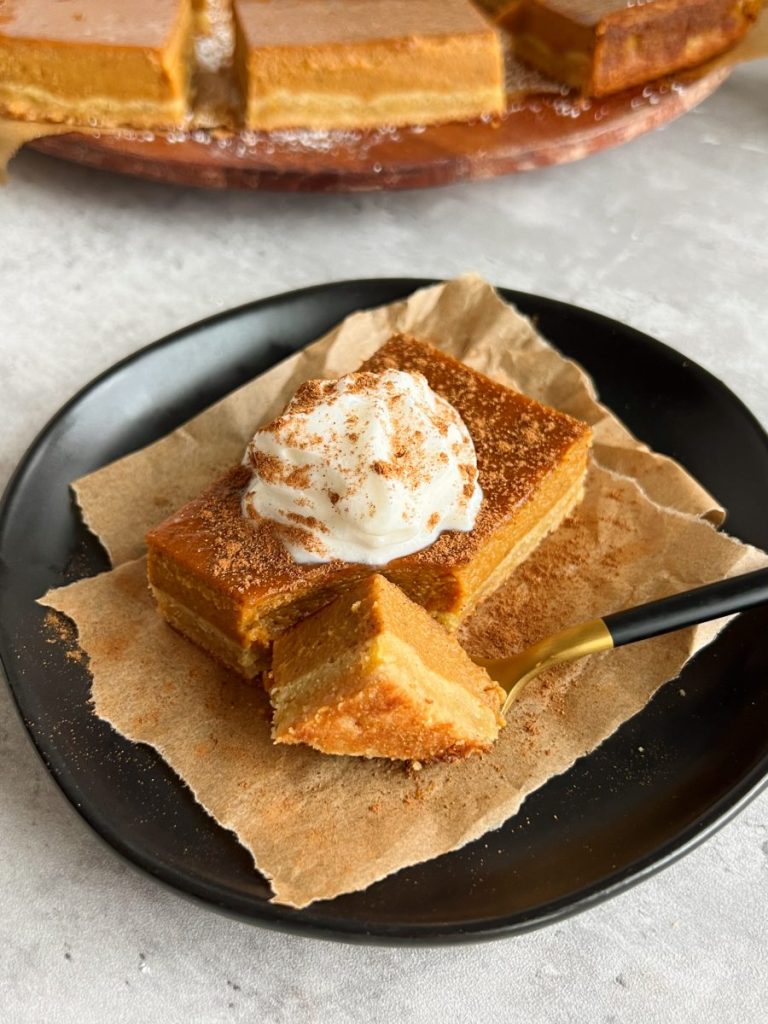
The most perfect gluten-free pumpkin pie is here right in time for the holidays! It has a grain-free crust made from almond flour and cassava flour, and has all the flavors of traditional pumpkin pie, in its own delicious dairy-free way.

To be honest, I was never a pumpkin pie fan growing up. I loved all things apples during the fall, and would always choose apple pie over pumpkin any day of the week.
But, I decided to step out of my comfort zone and test a recipe I never have before- pie crust. Gluten-free pie crust to be exact.
It took a little bit of trial and error, but i’m so happy with how this crust turned out! It would be perfect for sweet or savory fillings, and best of all-doesn’t require any freezing or rolling!

The filling is made from a mixture of pumpkin puree, pure maple syrup, coconut cream, almond milk, and all the pumpkin pie spices. It’s silky and smooth, and truly tastes like fall in one bite.
How to make gluten-free pumpkin pie
- You start by prepping the crust and baking it for 10 minutes. The crust is super easy to work with, and just needs to be flattened into your pie dish.
- Once that bakes, you prepare your pumpkin filling. When the crust is ready, you fill it with your filling and bake it for 1 hour.
- After an hour, you need to let the pie cool for at least two hours, as it will continue to set while it sits.
- Once it’s completely cooled, slice into it and enjoy it with some whipped cream!
There isn’t a lot of hands on work, which is what makes this recipe so simple!

Some tips for making your pie:
- You can prep the pie a day in advance, and refrigerate it after cooling it so it will continue to set. One less thing to worry about the day of the big meal!
- You can prepare the crust ahead of time and freeze it before you bake it, to save you some time.
- If you don’t need a gluten-free crust, feel free to use a store-bought frozen crust and just prepare the filling yourself!
I can’t wait for you guys to try this recipe! Be sure to leave a rating and review in the comments section if you do 🙂
If you’re looking for more holiday desserts, be sure to check out my roundup of 10 healthier holiday desserts!

Gluten-free Pumpkin Pie
Ingredients
Crust
- 1 + 1/2 cups fine almond flour
- 1/4 cup cassava flour, or substitute coconut flour
- 1 large egg
- 1/4 cup softened coconut oil
- 1/2 tbsp pure maple syrup
- 1/4 tsp salt
Pumpkin Filling
- 1 can of pumpkin puree, 15 oz (not pumpkin pie filling)
- 1/2 cup pure maple syrup
- 2 tbsp coconut sugar
- 2 large eggs
- 1/4 cup full-fat coconut milk, the creamy part at the top of the can
- 1/4 cup almond milk, or other non-dairy milk
- 2 tbsp tapioca flour
- 1 + 1/2 tsp vanilla extract
- 2 tsp cinnamon
- 1/2 tsp nutmeg
- 1/4 tsp ginger
- 1/4 tsp cloves
- Pinch of salt
Directions
- Preheat your oven to 350 F
- To make the crust, mix together the cassava flour, almond flour, and salt in a medium bowl. Pour in the egg, maple syrup, and coconut oil and combine together until a dough forms.
- Flatten the dough into a greased 10″ pie dish, pressing it up against the edges of the dish to create the crust. You can leave the edges leveled, or create a wave pattern by pinching the dough down.
- Prick the bottom of the pie with a fork a few times, to allow air to circulate while baking. Bake the crust for 10 minutes. Remove from oven and let cool while you prep your filling.
- For the filling, whisk everything together except the tapioca flour until smooth.
- Pour in the tapioca and whisk together, making sure there are no clumps.
- Pour the filling over the crust. Bake for a total of 60 minutes. For the first 40 minutes, cover the pie with foil so that the crust doesn’t burn. After 40 minutes, remove the foil and continue baking for 20 minutes. The top of the pie should be slightly jiggly, but not too wet. It will continue to set once it cools.
- Let the pie cool for at least 2 hours before serving. You can prep it a day in advance and let it set in the fridge overnight. Serve with your favorite whipped cream!
- Leftovers will stay fresh in the fridge for up to 1 week.


Ratings and Reviews
write a review